Bkav Ehoadon
Module Installation
Access the Apps, search for “VN E-invoice Bkav” in the search bar, and click Activate.

Integration Configuration
After installing the module, go to the Sales menu > Configuration > Vietnam E-invoice to proceed with the setup.
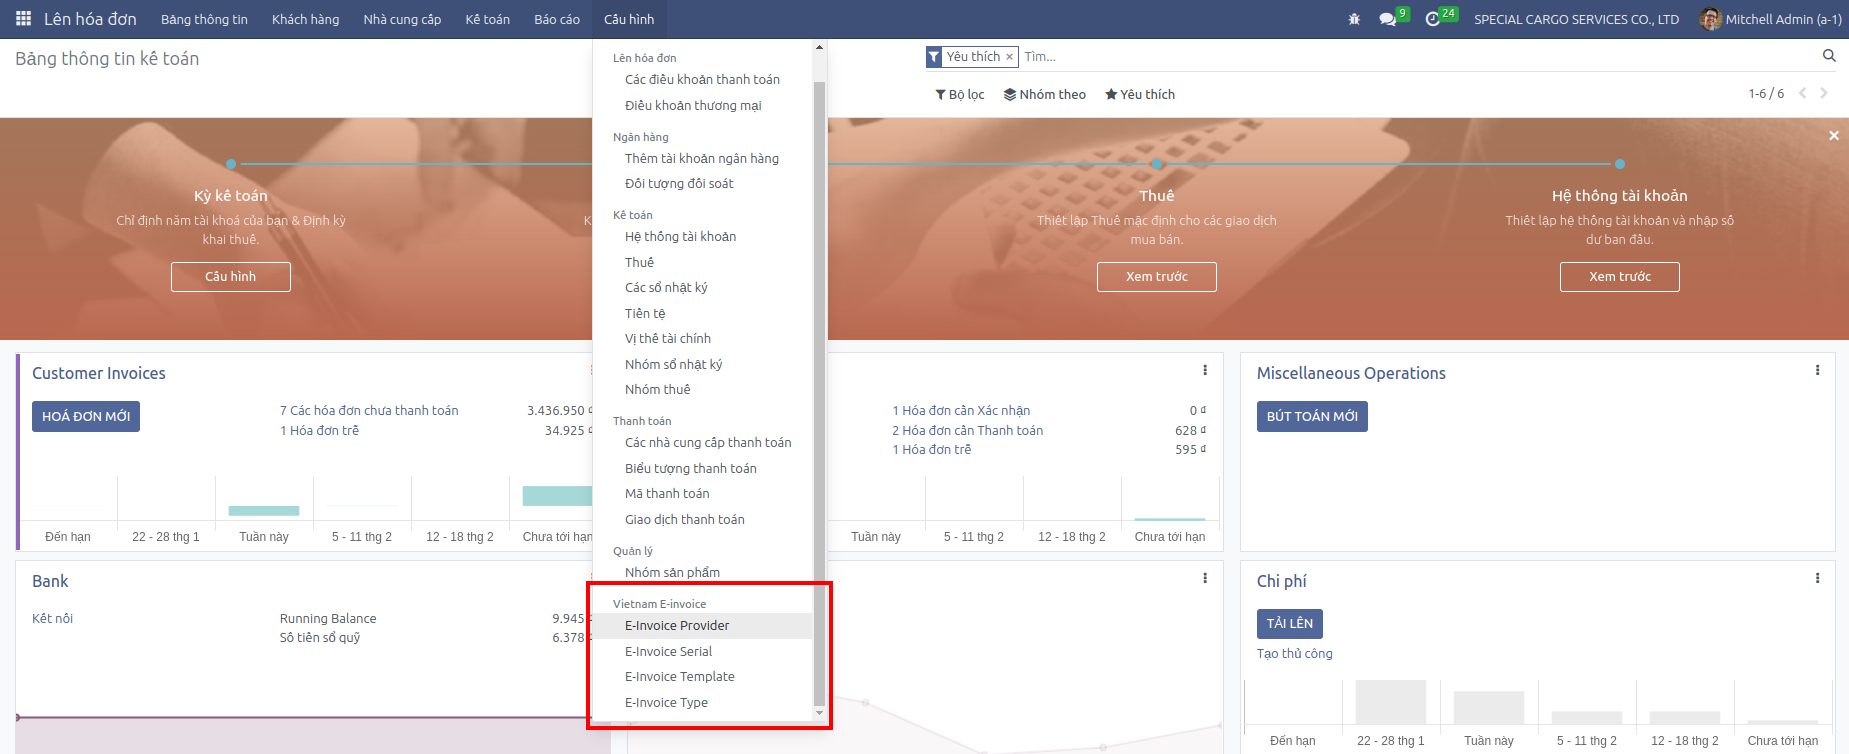
Step 1: E-invoice Service
Here you will see a list of supported E-invoice services.

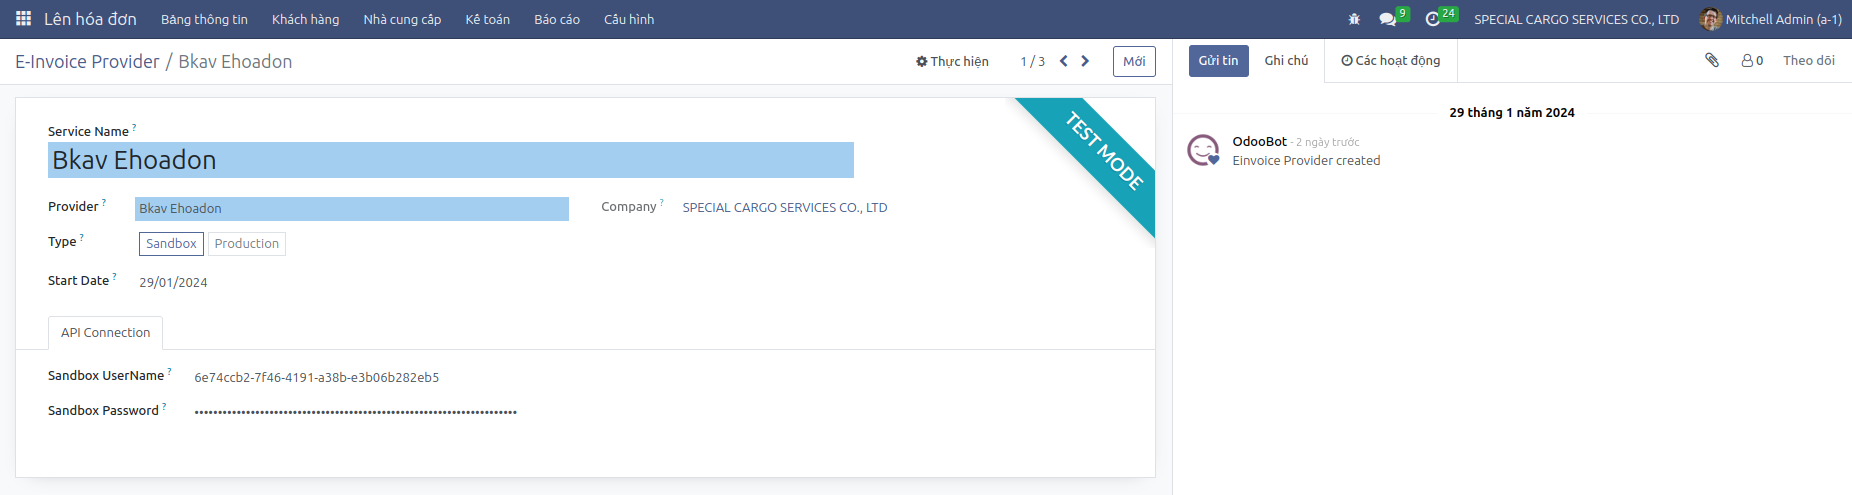
Click on the BKAV Ehoadon provider to set up the connection. Where Username corresponds to PartnerGUID, and Password corresponds to PartnerToken.
These values will be provided when you register an account with the BKAV Ehoadon service provider.
Step 2: Declaration of Serial/Template/Type of E-invoice
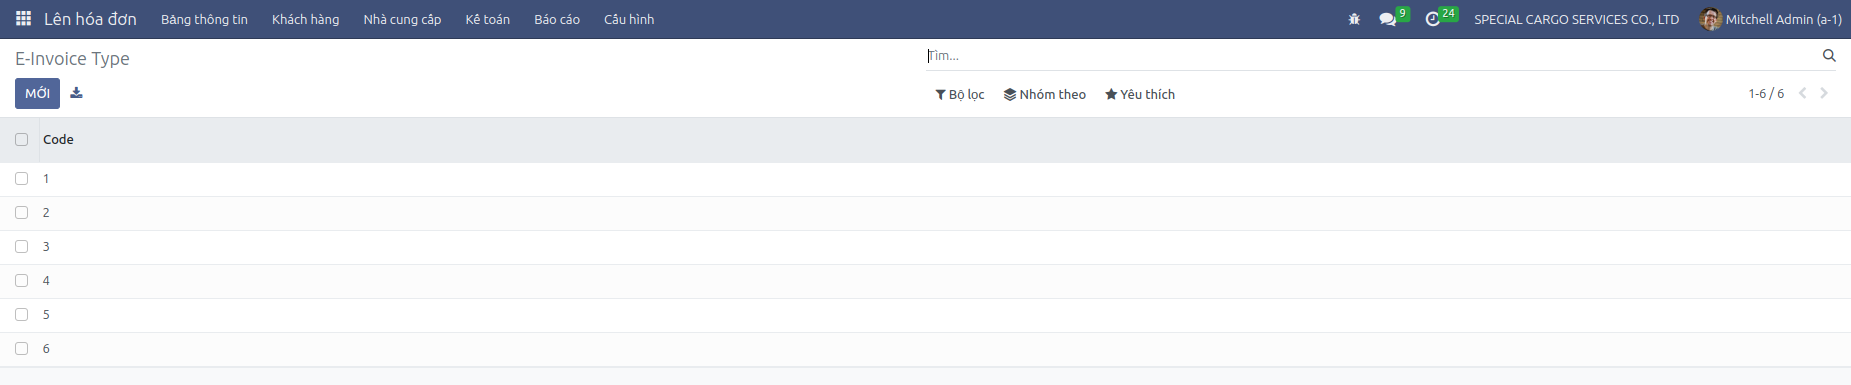
Declaration of E-invoice Type
The system has pre-created 5 types of invoices according to circular 78, which you can edit or create new if necessary.
Declaration of E-invoice Template
Create the E-invoice template that your business has registered, for example, in the image it will be 2/005 with Type 1 - VAT invoice.

Declaration of E-invoice Serial
Create the E-invoice serial that your business has registered, for example, in the image it will be K23TBS.

Step 3: Configuration on Customer Invoice Journal
After completing Step 2, go to the Sales menu > Configuration > Journals, select Customer Invoice.
Under the Vietnam E-invoice Configuration tab, please select the E-invoice Serial created in Step 2.

*Note: each journal can only configure one E-invoice Serial from one provider at the same time.
Issuing E-invoice
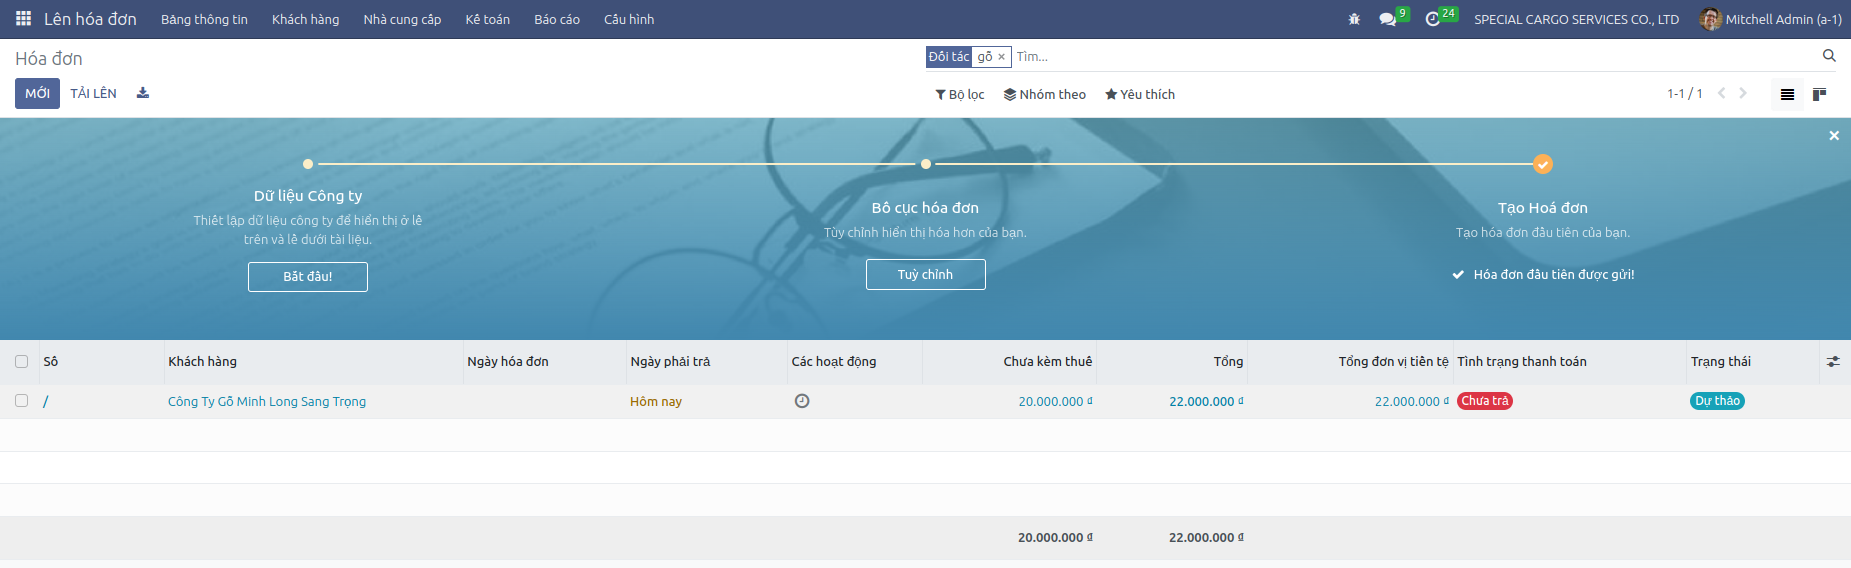
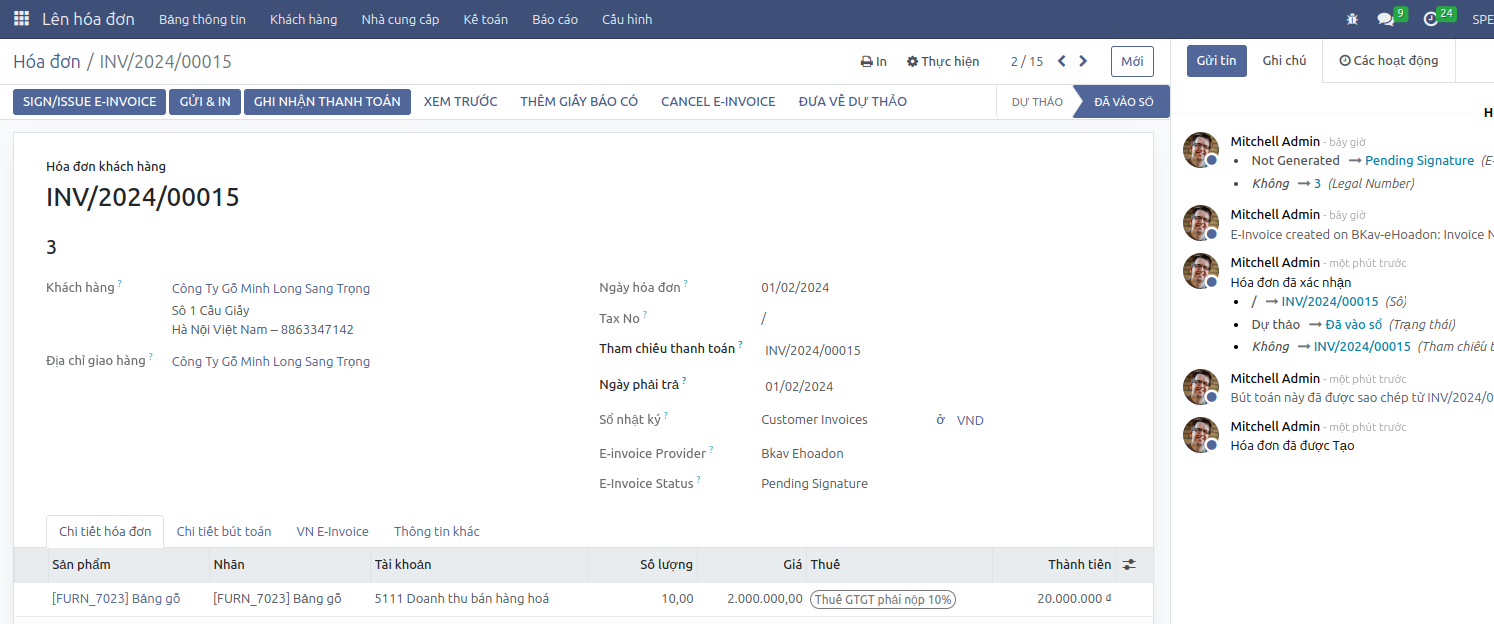
Access: Sales > Customers > Invoices, in the list of invoices, select the invoice to issue an E-invoice.
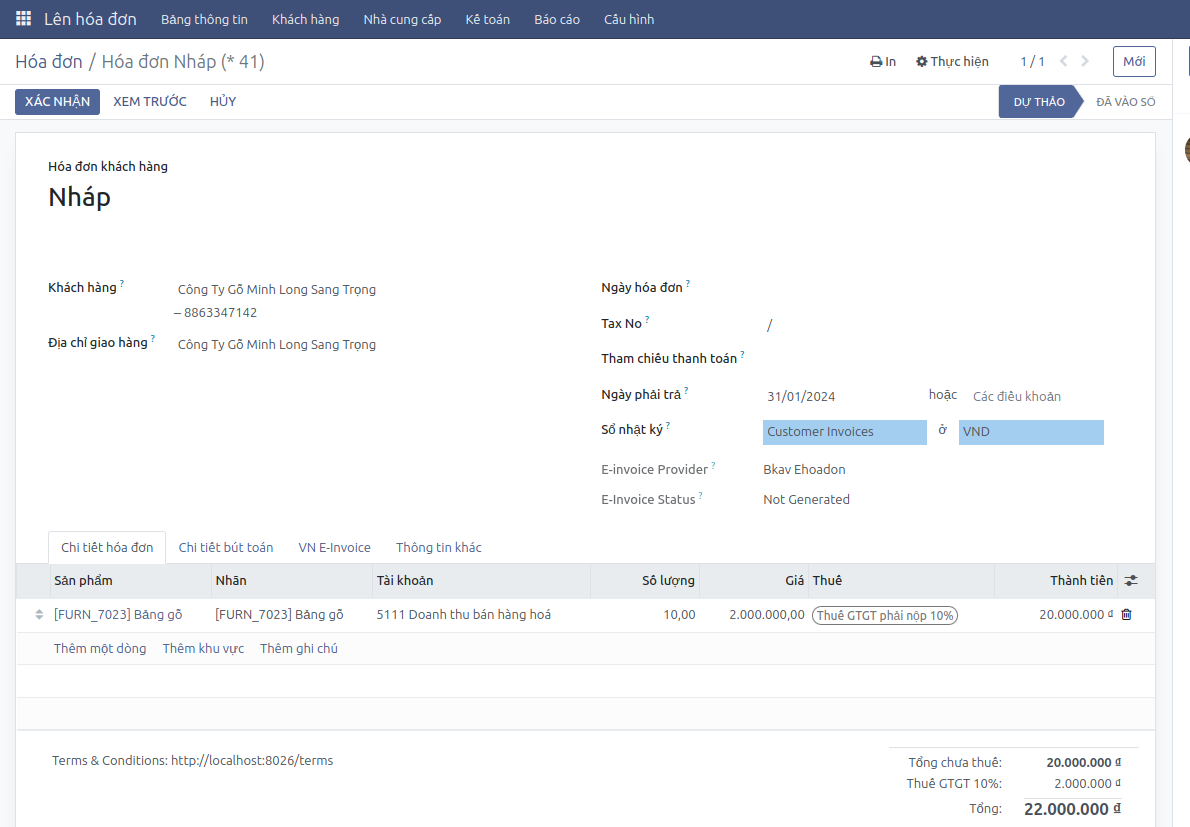
Step 1: Confirm Draft Invoice
Check customer invoice information: tax code, address, email for receiving invoices… and click Confirm.
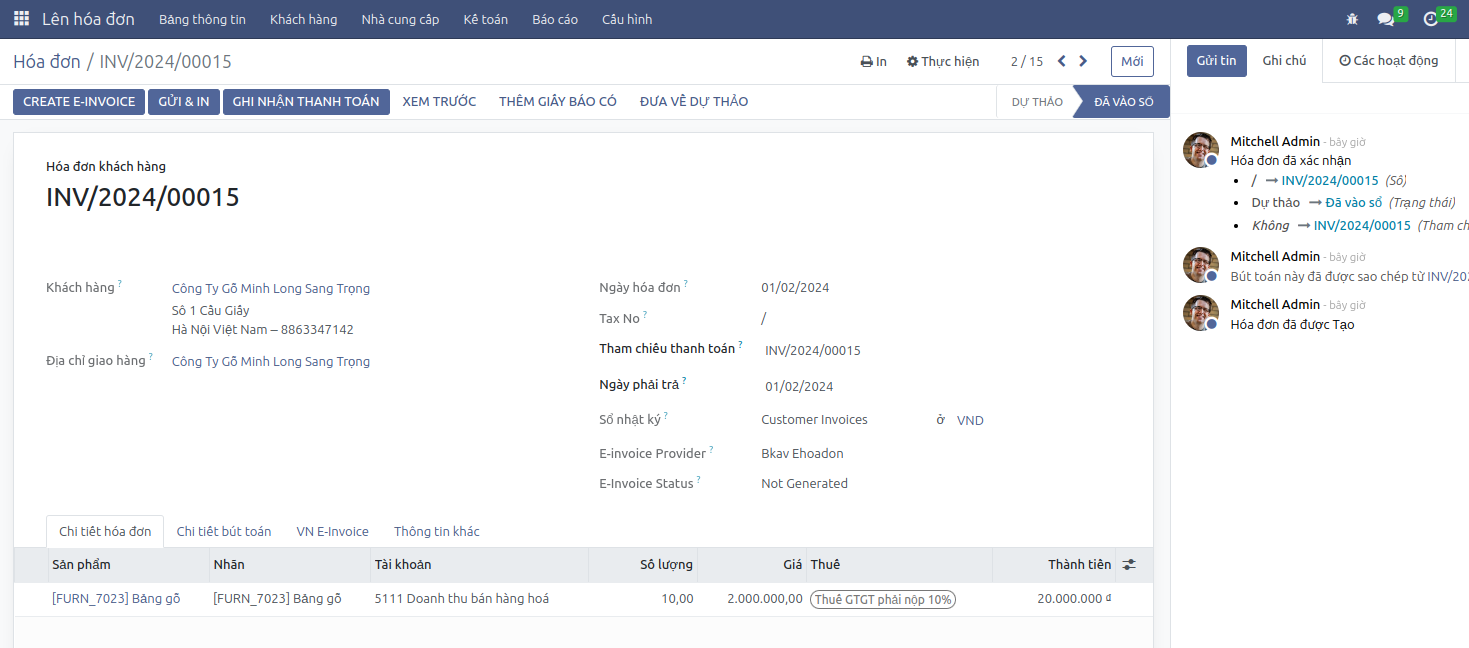
Step 2: Create E-invoice in Pending Status
On the invoice interface Posted, there is an E-invoice status Not issued, click Create E-invoice:
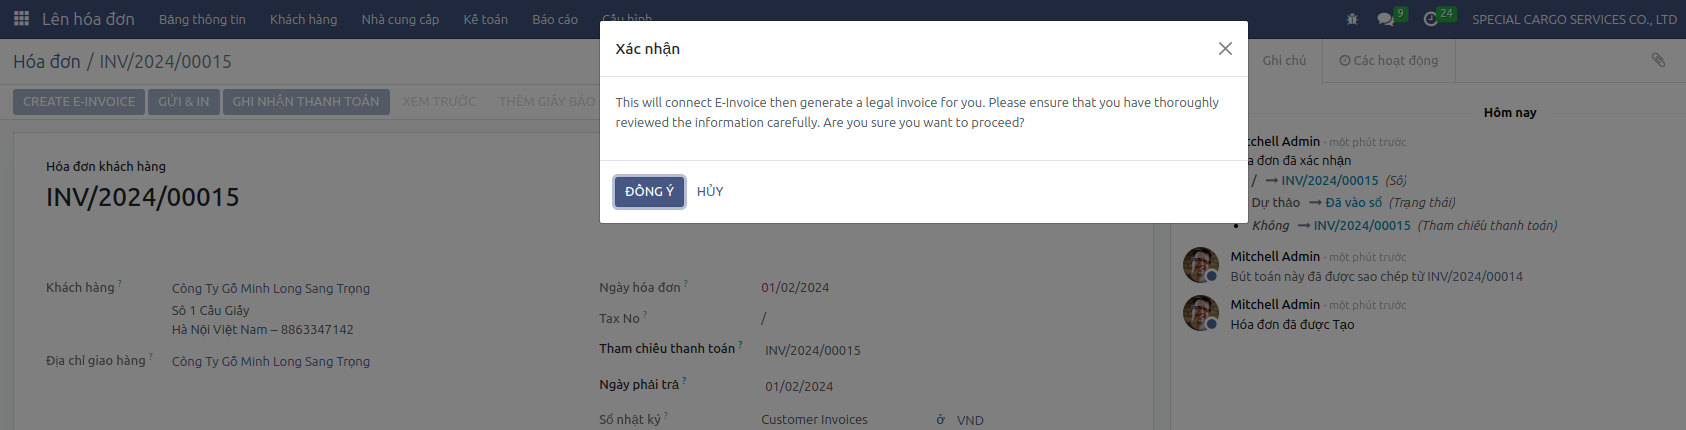
A warning popup to avoid accidental clicks, click Agree to proceed with creating the E-invoice.
Step 3: Sign and Issue E-invoice
On the invoice interface Posted, with the E-invoice status Waiting for signature, click Sign and issue E-invoice:
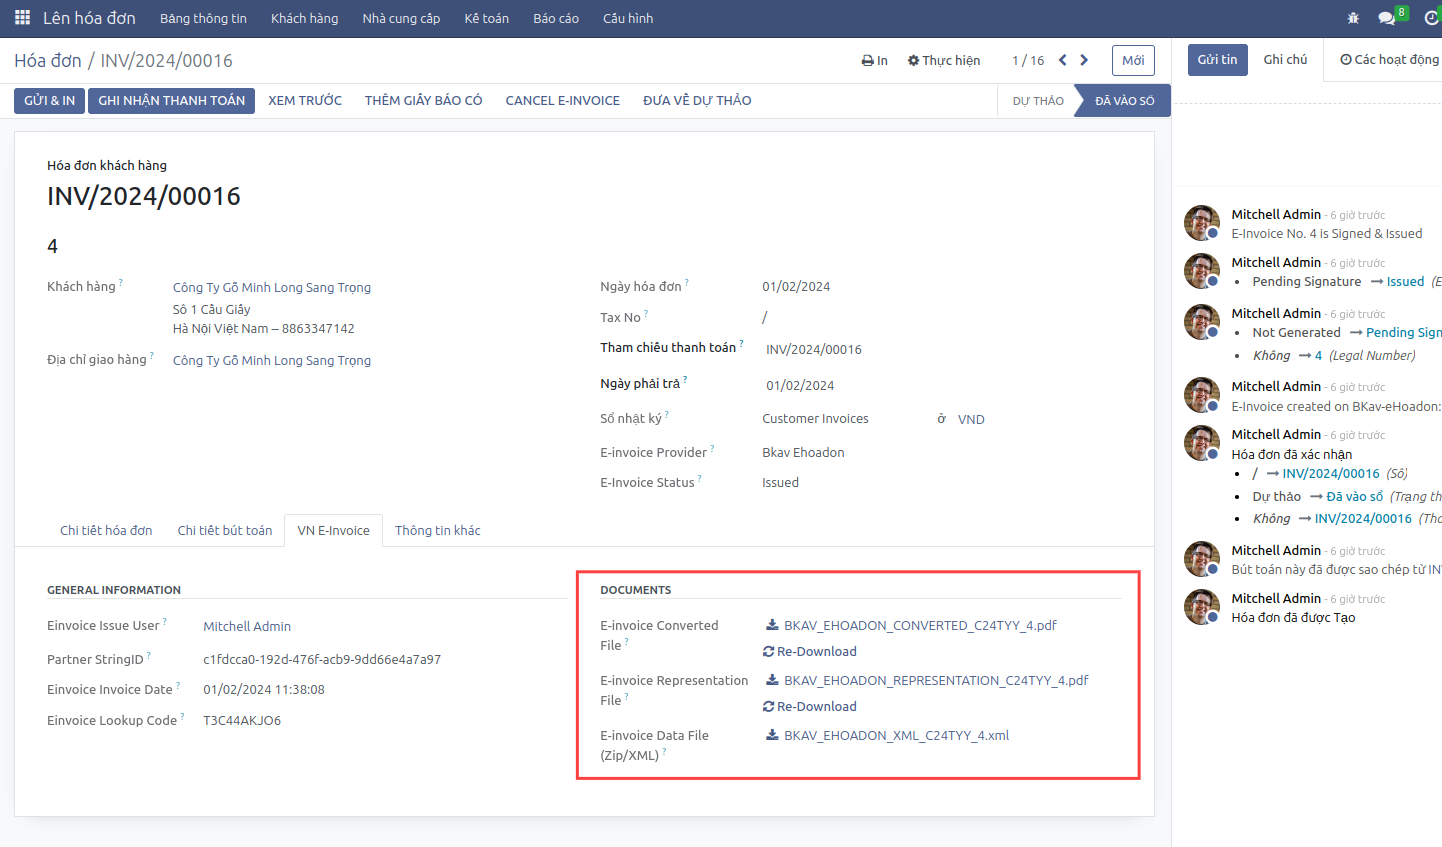
Step 4: Download E-invoice
Open the VN E-invoice tab to Download the converted E-invoice or Download the original E-invoice:
This action helps you save and view the invoice directly on the system.
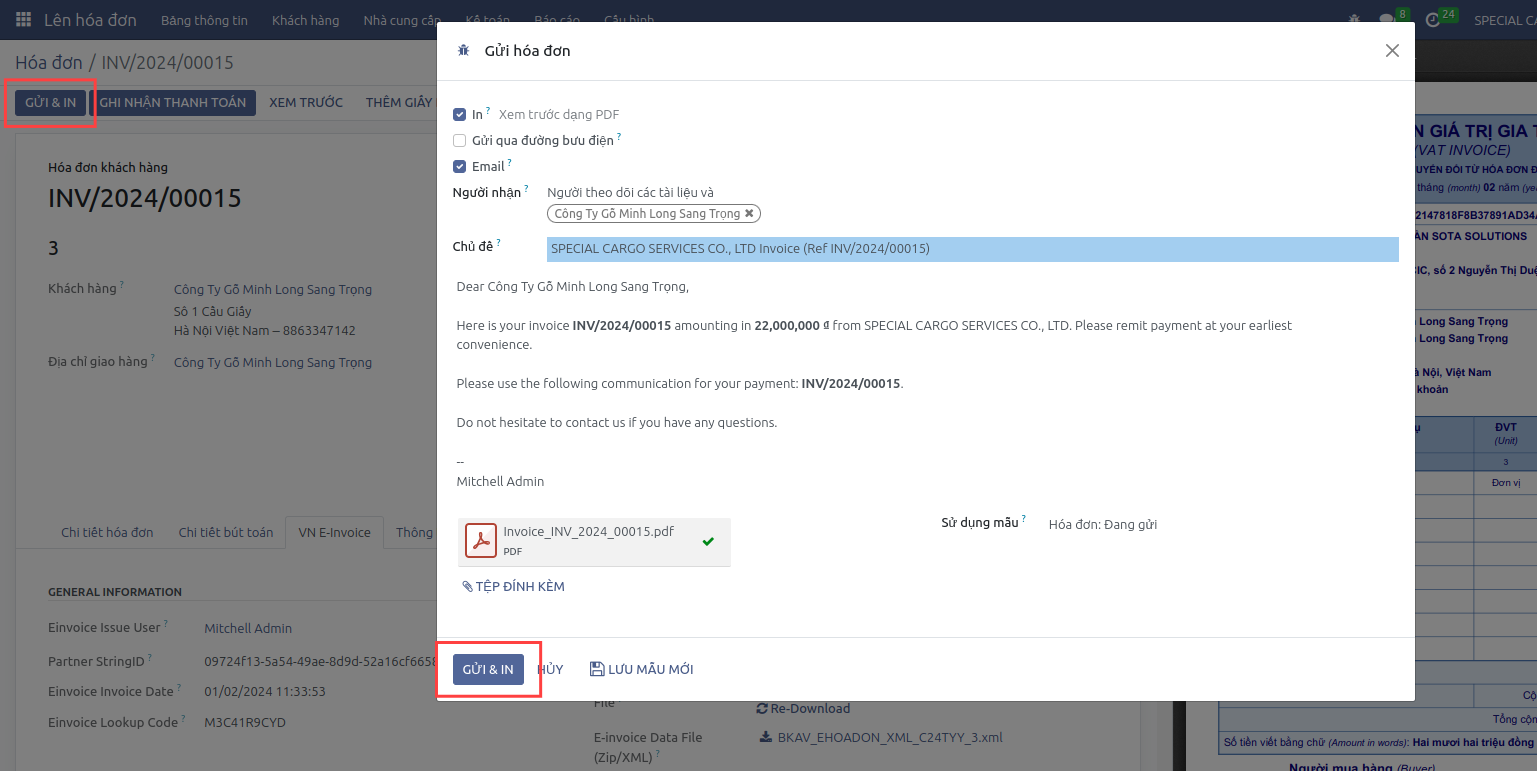
Step 5: Send the Invoice to the Customer
Click Print & Send to send the invoice to the customer:
Immediately after clicking Print & Send, a pre-created email appears showing invoice number, value, and attached PDF invoice file. You can use the default email template or edit the email content to suit and click Print & Send to send the invoice issuance notification to the customer.
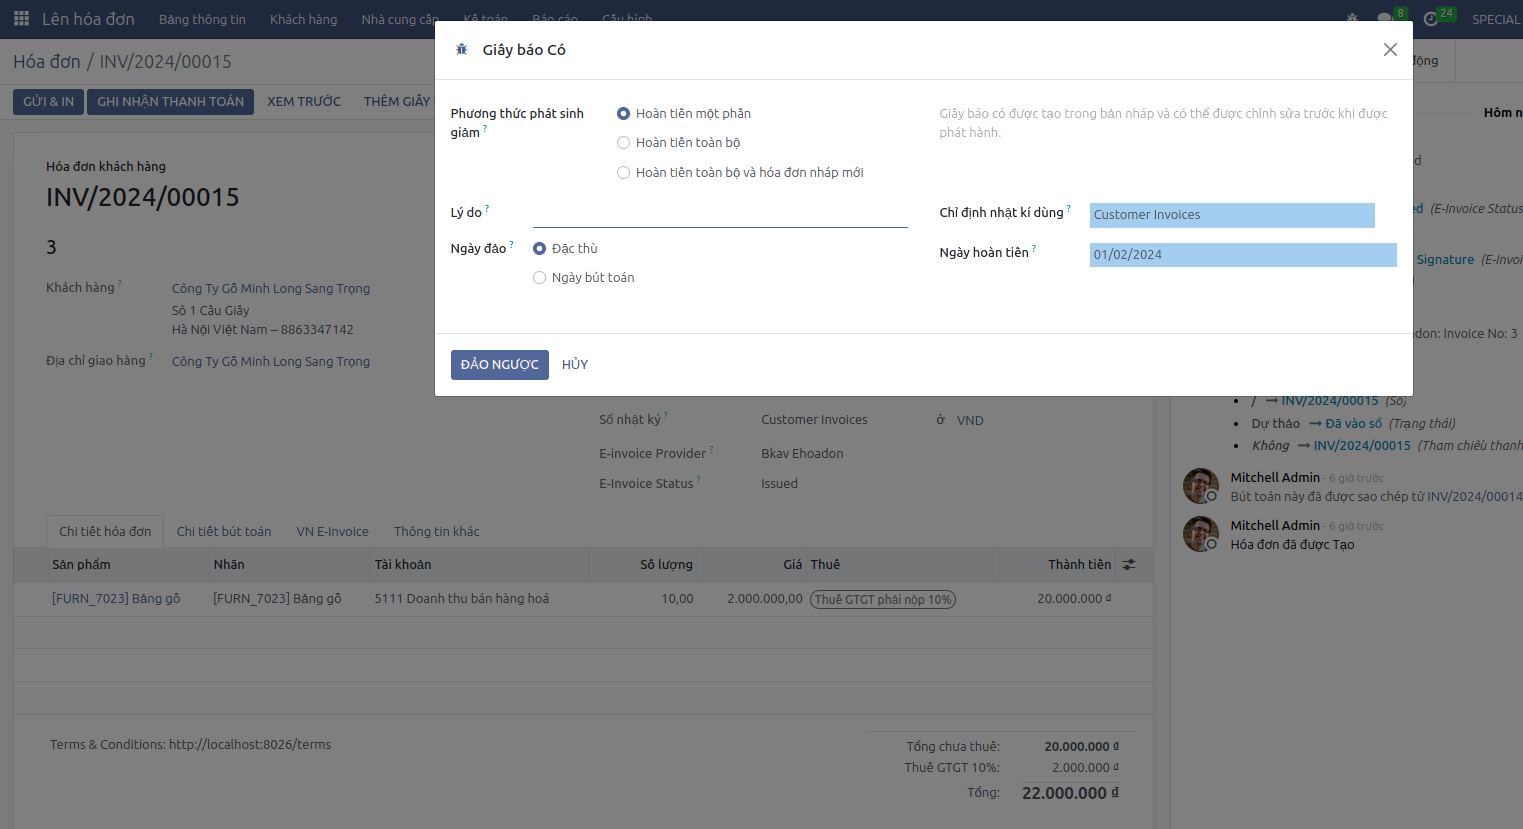
Adjusting Reduced E-invoice
On the issued E-invoice interface, create an internal reduction invoice.
Click Add credit note, select partial or full refund, then click Reverse.
Continue with the same steps as Issuing E-invoice to issue the reduced adjustment E-invoice.
Canceling Issued E-invoice
In case of an issued E-invoice and detecting errors that need to be canceled, follow the correct sequence as follows:
Step 1: Cancel the Issued E-invoice
On the issued E-invoice interface, click Cancel E-invoice.

Enter the cancellation reason and attach a protocol to cancel the invoice.

Click Confirm, the E-invoice status is updated to Issued and Canceled, the internal system invoice status remains Posted.
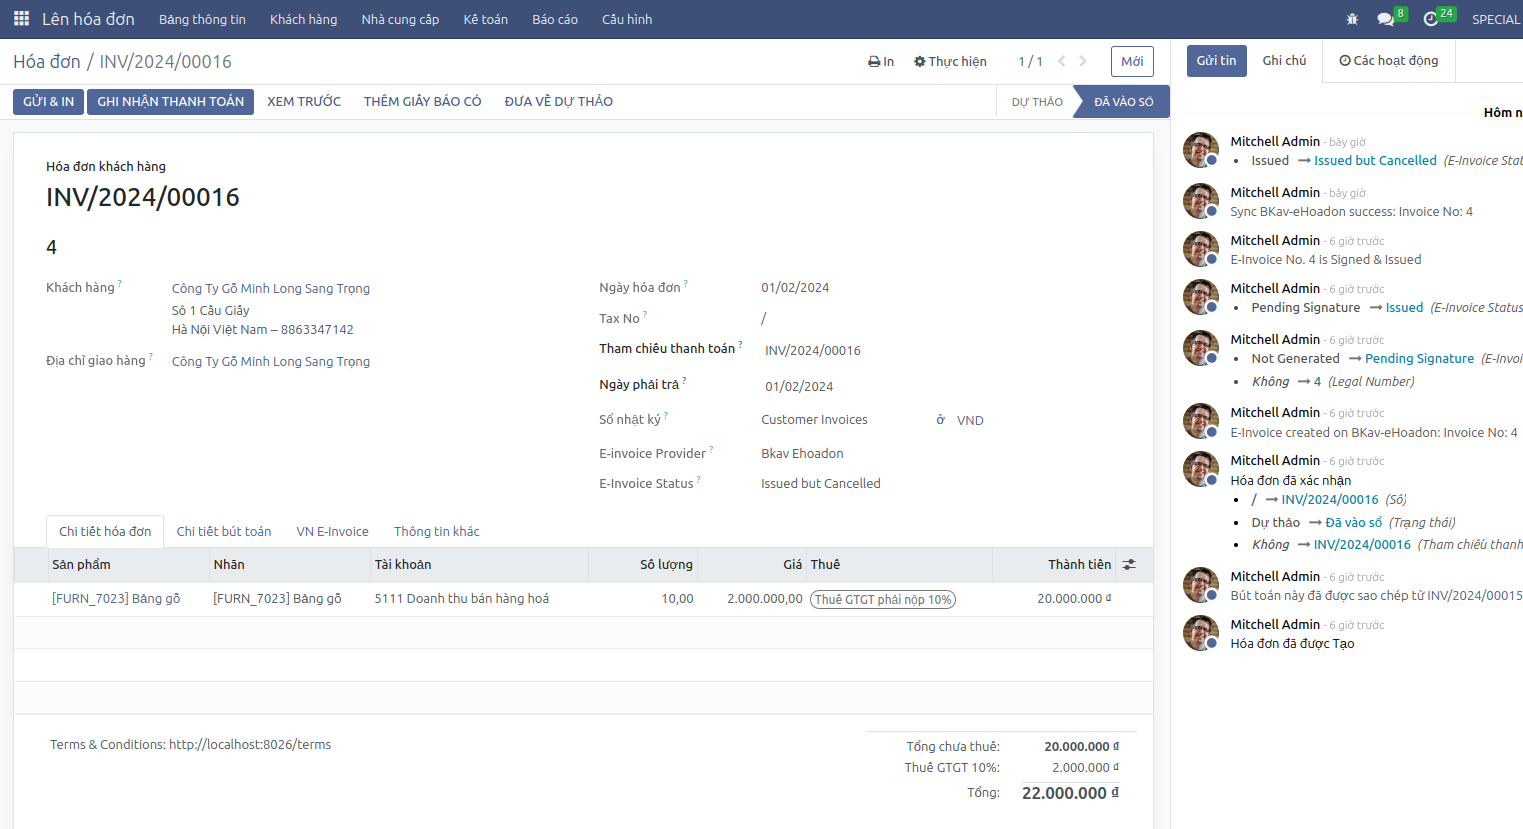
The system will automatically generate error notification 04SS to send to the Tax Authority.
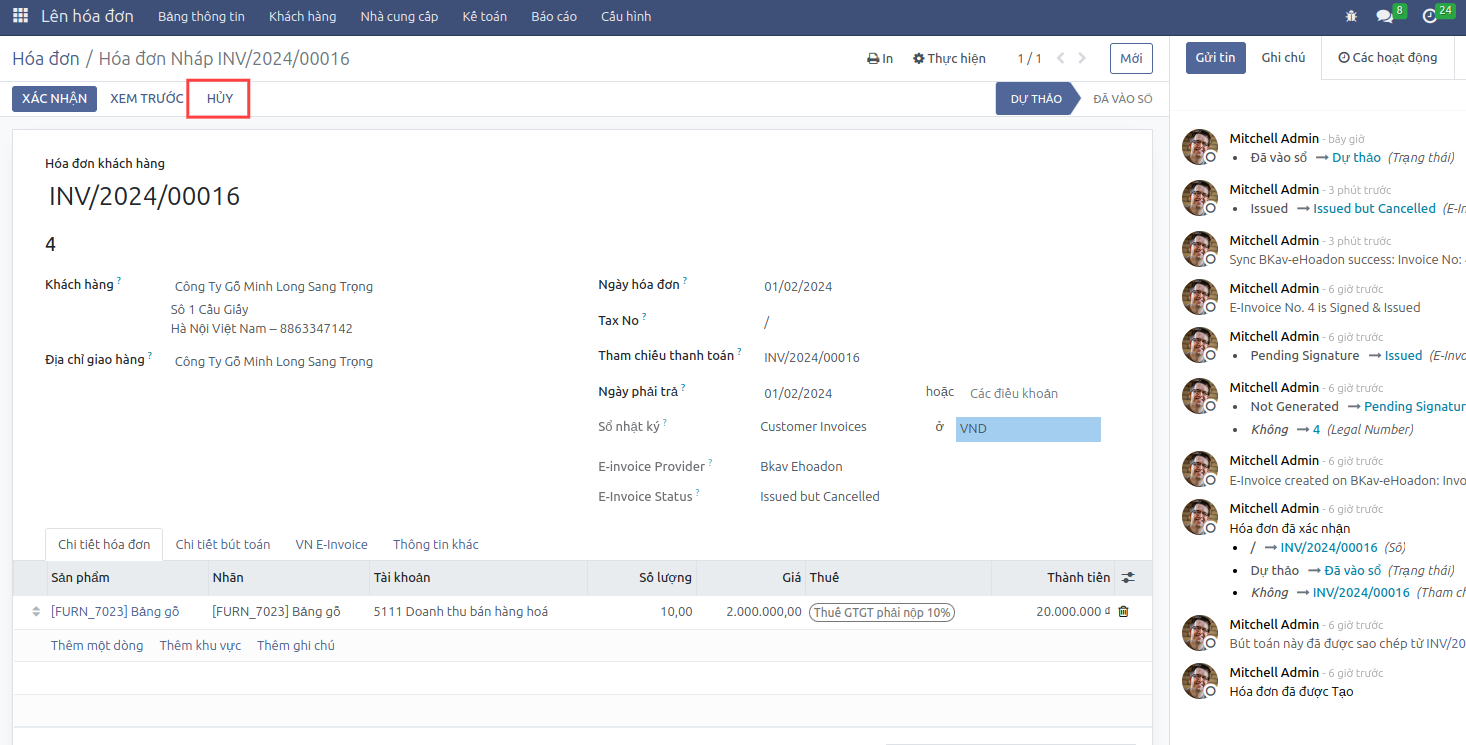
Step 2: Cancel the invoice on the internal system
Only after completing step 1 of cancelling E-invoice, you can continue by clicking Set to draft.
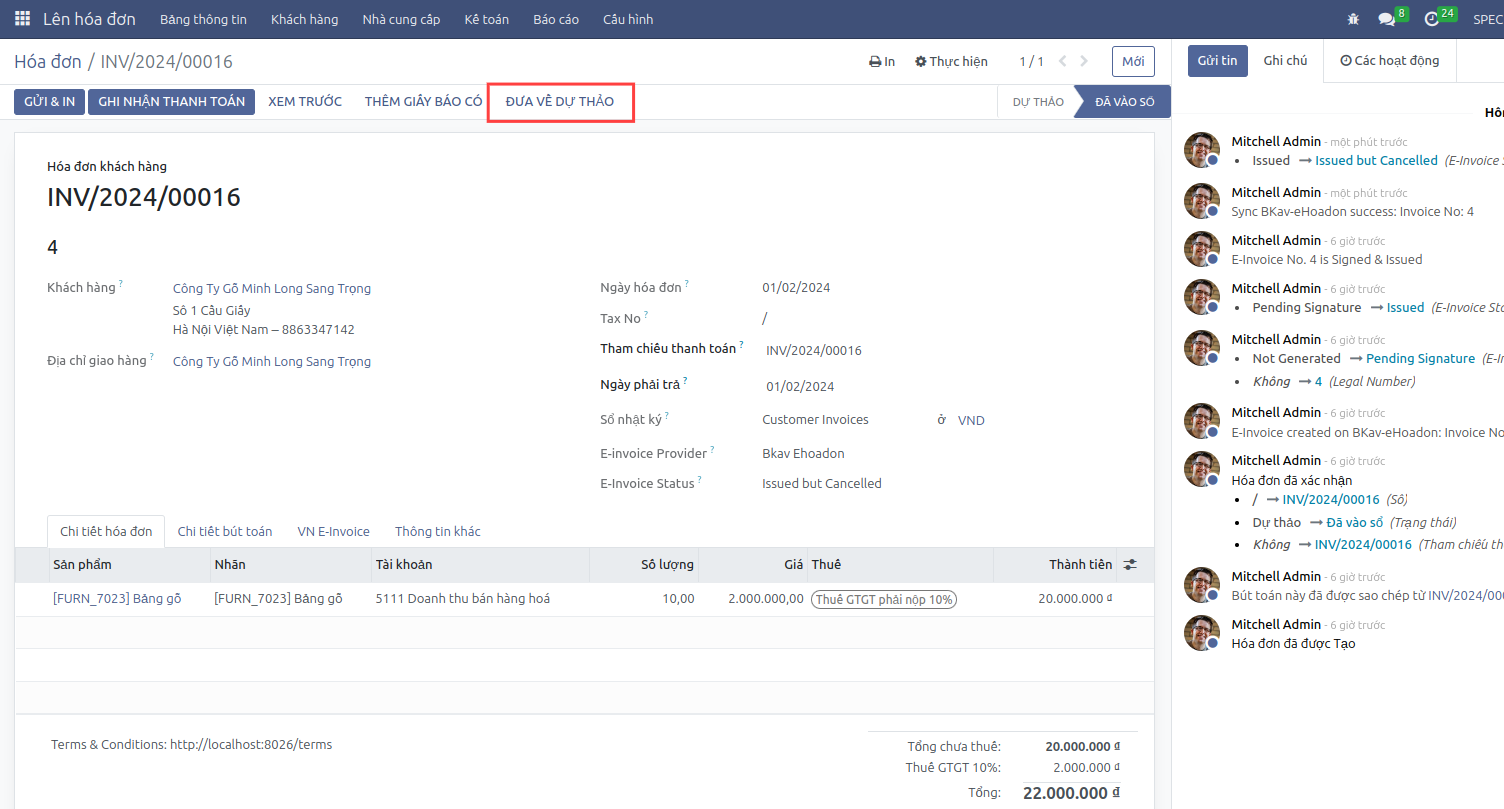
Continue clicking Cancel to complete cancelling the invoice.
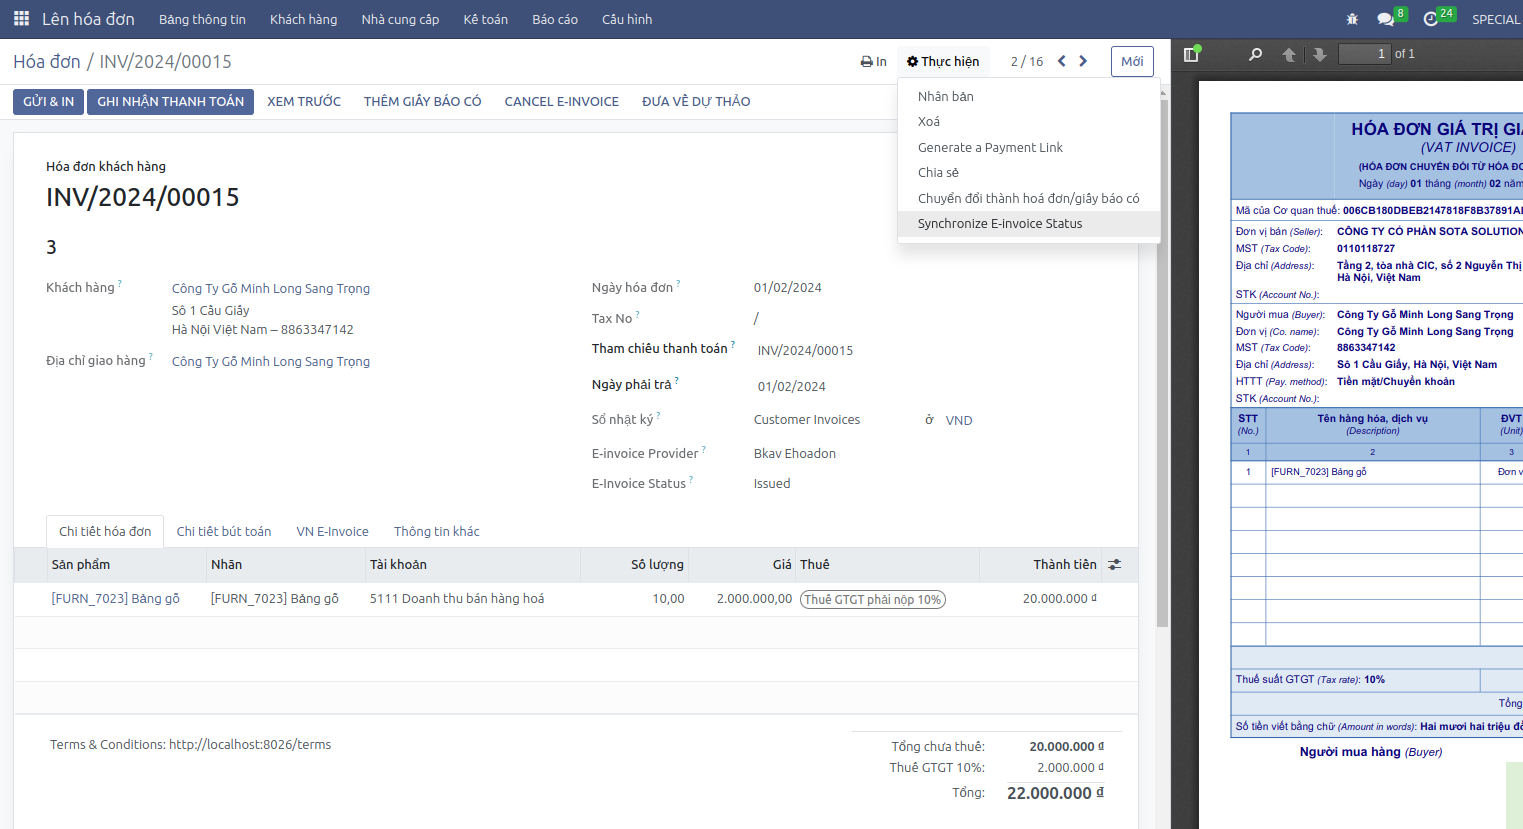
Synchronize E-invoice Status
When the E-invoice status is inconsistent with the provider, you can synchronize it through Actions -> Synchronize E-invoice Status.